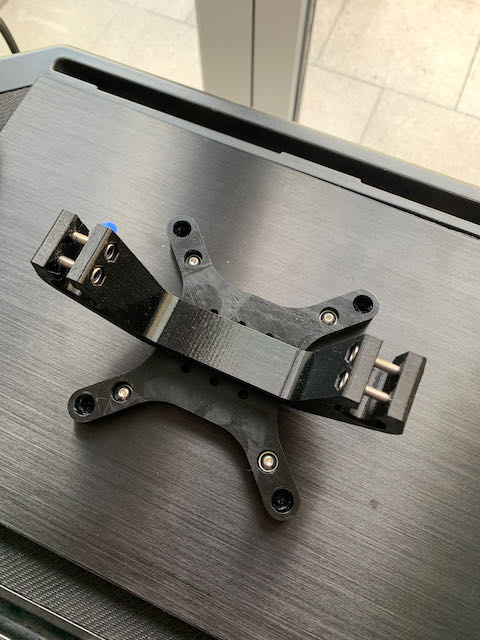
After much testing, designing, printing, testing… you get the idea, I decided to remodel the VESA mount based on a new, more substantial and certainly more adaptable core bracket design.
Available NOW in limited numbers
This revised approach to the bracket design removes the requirement to use the top of the bar, and thus removes the need to ‘nurture’ the bracket around the bar corners. Additionally, you’ll see from the photos below that it’s fairly substantial and therefore holds more weight. Some may say over-designed. However, when it’s holding your expensive tablet or VESA monitor, then that’s cool.
The current tested weight is 2.5kg MAX for the screen. If you are looking for the perfect Wattbike VESA UHD 4K screen for your AppleTV 4K, then I can’t recommend this one from Amazon highly enough (This is NOT a sponsored link). I like it so much, I use it myself – see photos.
IMPORTANT: The new Apple TV has NOT changed in size and is still 98mm x 98mm X 35mm
More Beef
The actual VESA mounting plate has also been beefed up a little, adding more rigidity and reducing screen wobble. It also allows for both VESA75 and VESA100 standards using the same bracket.
Apple TV Mount
On top of all this, it’s super easy to fit and extremely flexible to use – as you can see from the photo below, I also use the same bracket reversed for my Apple TV ‘Backpack’. The bracket is attached by simply sliding onto the existing mounting bar and finger-tightening the four bolts that grip the bar with super-human strength. No need to over tighten here!
Material Update
Materials have changed too. I’ve been experimenting with different printing materials and have settled on a specific PETG blend that is incredibly strong and more resistant to heat. It also allows for far more flex and is considerably less brittle than the previous PLA material used.
Low Rider
The photos above show how adaptable this new approach is. You can adjust the height of the mounting bar and then adjust the position of the brackets, so you can get the screen a lot lower with this VESA bracket approach – lower than the original mounting. And the design has allowances so as not to have to remove the original bottom mounting bracket from the Wattbike.
The top screen bracket shown in the photos is entirely optional. I was simply testing the spacing and using both together (I use them both all the time). The photos show my current permanent Wattbike Dual Display AppleTV setup.
I think I may be now at peace with this one! …and relax.


